Using the Summer Vibes Layout from the MollyQCreates resource library
You’ll be vibin’ with this layout once you see how fun and easy it is to download files from the MollyQCreates Resource Library and upload them into Cricut Design Space! This tutorial walks you through the entire process — from downloading a zipped file to customizing the design for your scrapbook layout.
🎥Prefer to watch instead of read? Check out the full video tutorial below! I’ll walk you through each step of the process.
💻 File Formats and Compatibility
Don’t have a Cricut? No worries!
Each digital download includes multiple file types — SVG, DXF, EPS, PNG, and PDF — so you can use them with most electronic cutting machines, including:
- Cricut
- Silhouette
- Brother ScanNCut
- Sure Cuts A Lot
This tutorial focuses specifically on Cricut Design Space, but the download steps are similar for other cutting machines.
🔐 Accessing the Free Resource Library
To get started, head to MollyQCreates.com and click Resource Library in the top menu. Because the library is password-protected, you’ll need to subscribe to the weekly newsletter to receive access. Once you sign up, you’ll get the password sent to your inbox — along with updates about new designs and tutorials.
(Don’t worry — you can unsubscribe anytime and still keep the password. Your privacy is always protected!)
You can sign up using the form below or at the bottom of this post.
Once you have your password, open the Resource Library, find the file you’d like, and click to download.
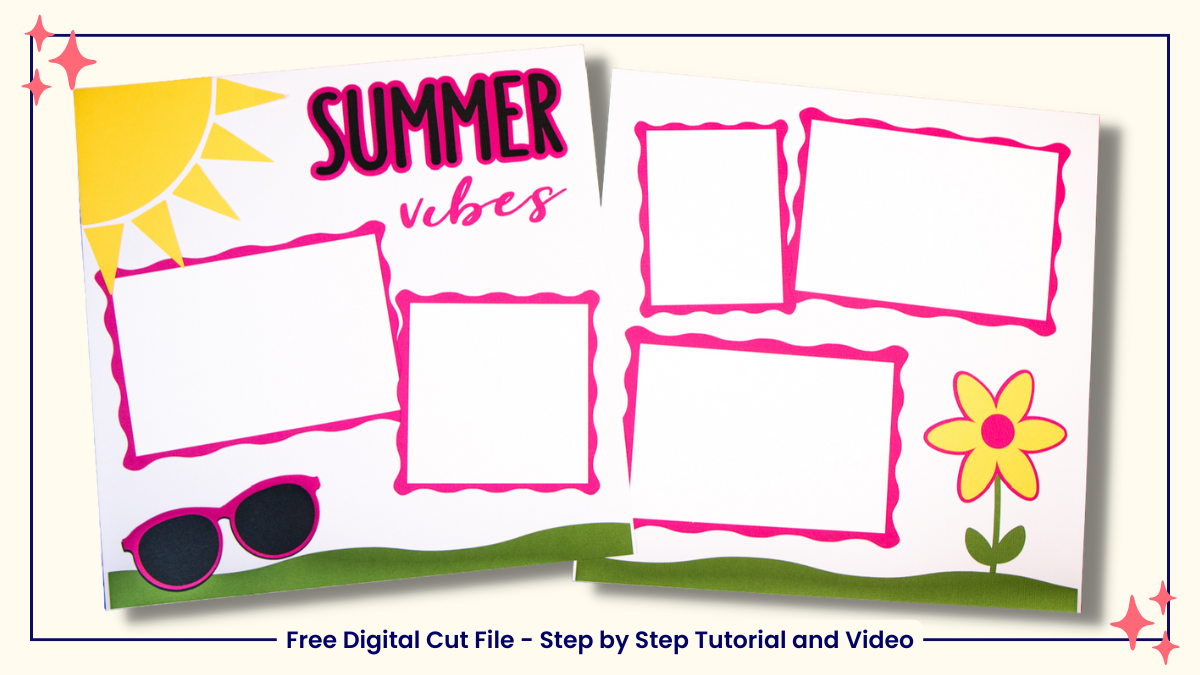
For this tutorial, we’ll use Pattern 2A – Summer Vibes Layout under the Patterns and Titles section.
💾 Downloading the File
Where your file appears after downloading depends on your browser:
- Chrome: Bottom-left corner of your screen
- Edge: Top-right corner of your screen
You can always find the file in your computer’s Downloads folder.
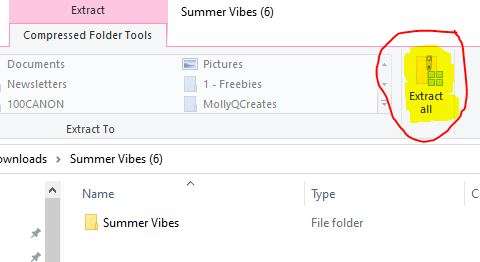
Once located, double-click and choose Extract All, then select where you’d like to save it on your computer.
🗂️ Organizing Your Files
I recommend keeping all your digital downloads in one master folder for easy access.
📁 Digital Designs
└── 📁 Summer Vibes – MollyQCreates.com – Personal Use
Naming folders this way helps you remember what the design is, where it came from, and what license it has.
All downloads from the Resource Library are for personal use only. If you’d like a commercial license to sell finished products, please email [email protected].
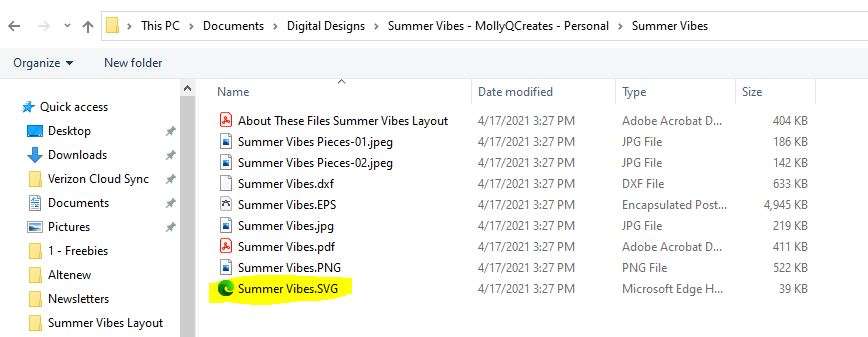
Once extracted, you’ll see several file types (SVG, DXF, EPS, PNG, PDF). If you’re using a Cricut, you only need the SVG file — the others can be deleted to save space.
✂️ Uploading to Cricut Design Space
Now that your file is saved, let’s bring it into Design Space:
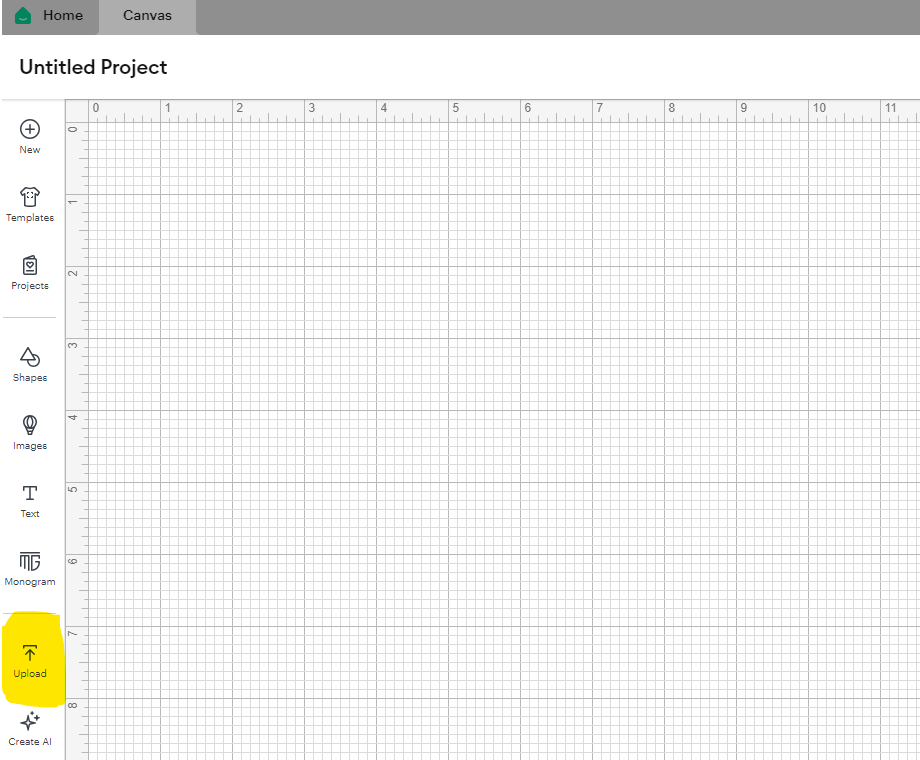
- Open Cricut Design Space and start with a new, blank canvas.
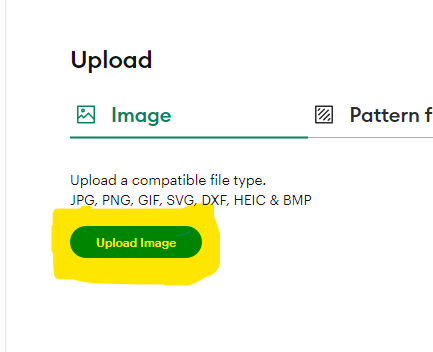
- From the bottom left toolbar, click Upload (icon with arrow).
- Select Upload Image. At this point, you can either select Browse and locate the file on your computer or drag and drop the Summer Vibes file on this screen. For Cricut, you want the SVG file. Once the file has been added to this screen, select Continue.
- You will see a preview of the file on your screen. Click Upload in the bottom right corner.
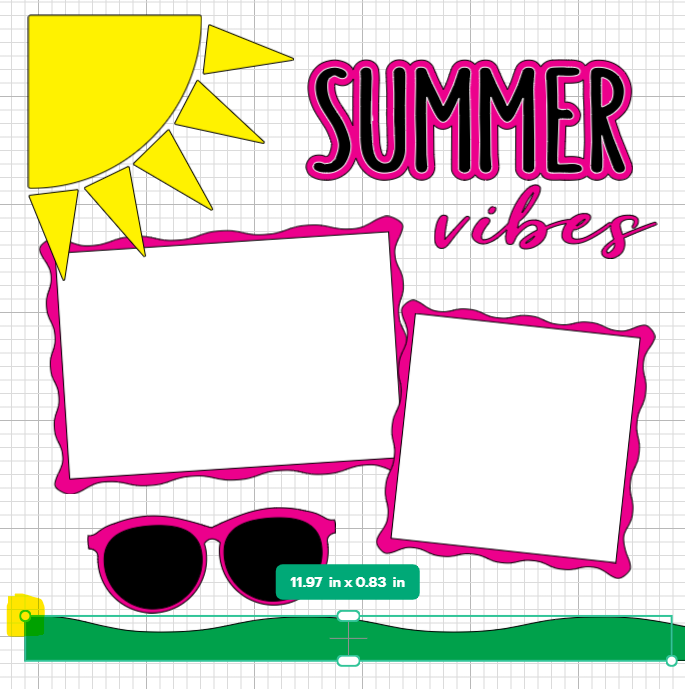
Your Summer Vibes layout will appear on your canvas, ready to use!
🎨 Customizing the Design
Want to tweak it a bit? That’s the beauty of digital files — you can make them fit your layout perfectly.
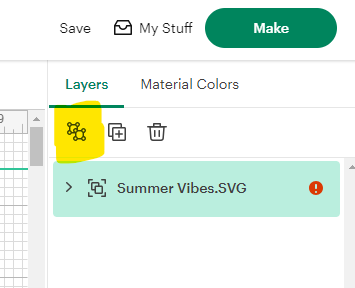
Ungroup the Design
Select the design, then click Ungroup (top-right, above the Layers panel).
Now you can work with each piece individually.
Resize the Grass
The grass layer is set to 12″, but Cricut’s standard 12″x12″ mat only cuts up to 11½”.
If you have a 12″x24″ cutting mat, you have a couple options:
- Use a 12″x24″ mat – This is what I used. It leaves a small gap on the sides, which doesn’t bother me.
- Extend the grass – You can select the grass and drag the “circle” on the selection to make the grass bigger. If you do this, make sure both sections of grass are re-sized the same amount so they match in the middle.
If You Have a 12″x12″ Mat
You can resize the grass smaller to 11 1/2″ wide or slice it into two pieces and piece them together on your layout.
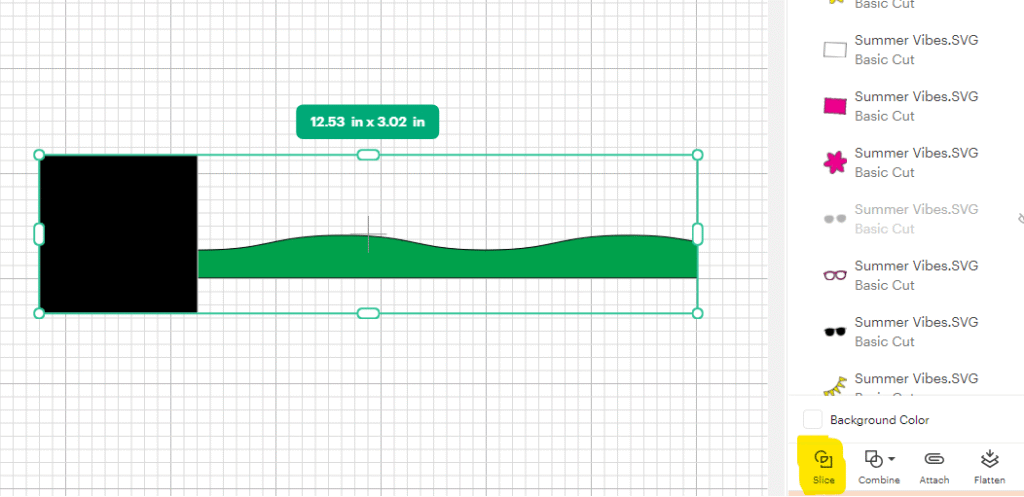
✂️ How to Slice a Design
- Select the grass and move it so it is not close to the other layout elements. This will make it easier to use the Slice feature.
- Go to Shapes → Square.
- Resize and place the square over the grass where you want to cut it.
- Select both the square and the grass (hold Shift to select both).
- Click Slice in the lower-right Layers panel.
- Delete the extra pieces — you’ll be left with two grass sections.
Repeat for the other side.
🌸 Bonus Elements
Scroll through your Layers panel on the right and you’ll notice a few hidden gems:
- A matte layer for the word Vibes
- Sunglass lenses (hidden for easier alignment)
- A flower stem without leaves
Click the eye icon beside each layer to make them visible and customize as you wish.
🧡 What Not to Cut (and Why)
For this design, I hid all the white photo mats and cut those by hand using my trimmer.
Each white square is ¼ inch larger than the photo it frames.
Here’s a quick reference:
- For a 4″x6″ photo → cut a 4¼”x6¼” mat
- For a 4″x4″ photo → cut a 4¼”x4¼” mat
- For a 3″x4″ photo → cut a 3¼”x4¼” mat
This layout is designed for:
- Three 4″x6″ photos
- One 3″x4″ photo
- One 4″x4″ photo
If your photos are a different size, simply delete the mats you don’t need or duplicate the ones you do — that’s the flexibility of digital files!
🌼 Changing the Design
Feeling creative? Try a few of these variations:
- Make the flower smaller and duplicate it several times to line the grass.
- Replace the sunglasses with multiple smaller flowers for a softer look.
- Create a 12″x12″ layout by arranging the elements and reducing their size.
The best part about digital designs is their versatility — you can reuse the same file for multiple layouts just by changing the colors, patterns, or arrangement. Each one will feel completely unique!
✂️ Ready to Cut?
Once you are happy with your design on screen, click the Make button in the upper right corner and follow the prompts to cut your design.
🎥 Watch the Full Tutorial
Prefer to see it all in action? Watch the step-by-step video below to follow along as I download, upload, and customize the Summer Vibes design in Cricut Design Space.